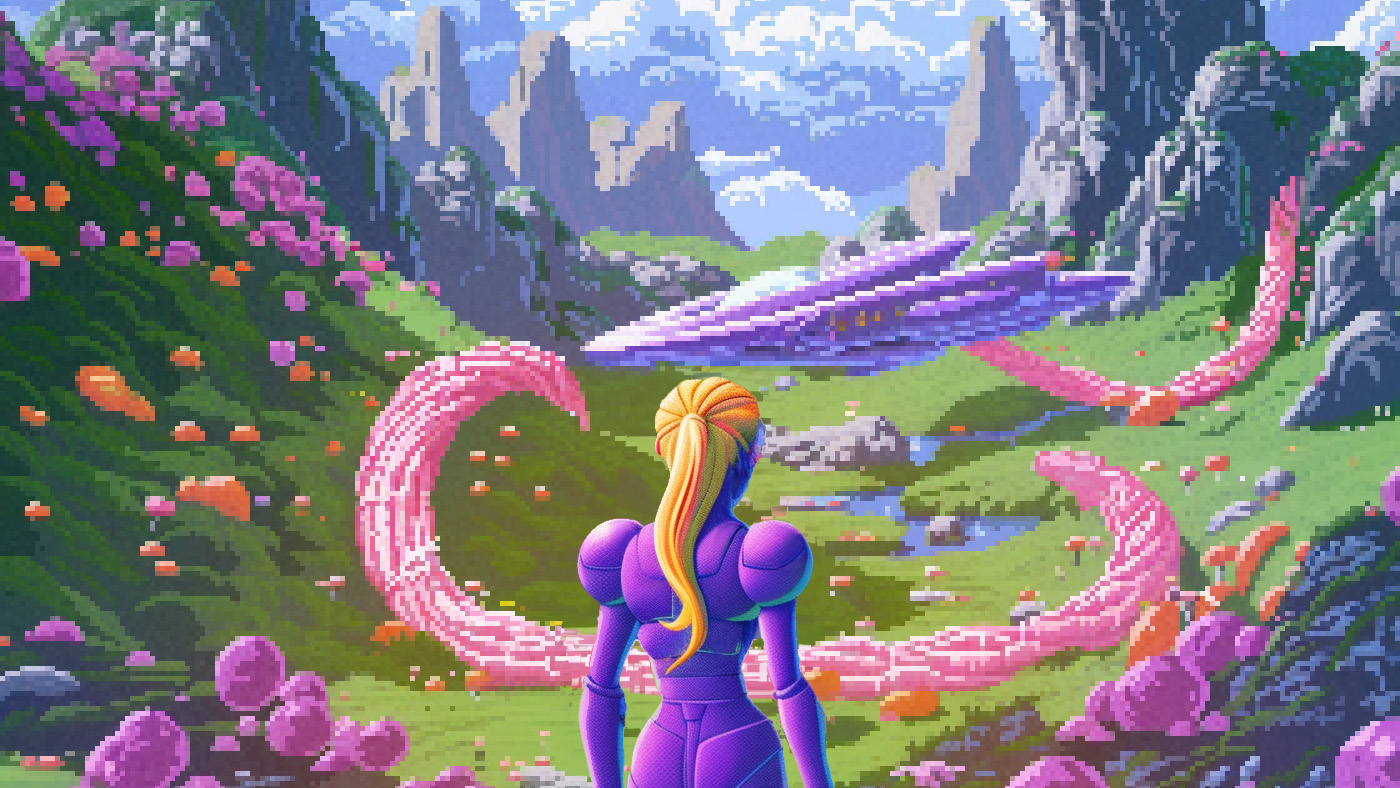
Open-world collecting game Illuvium Overworld was released in beta in December 2023. In this article, Polemos game expert Cavan “Caveman” Roe dives into the detail of how to make best use of the powerful drone that accompanies your ranger character through the beautiful but desolate Crimson Waste region.
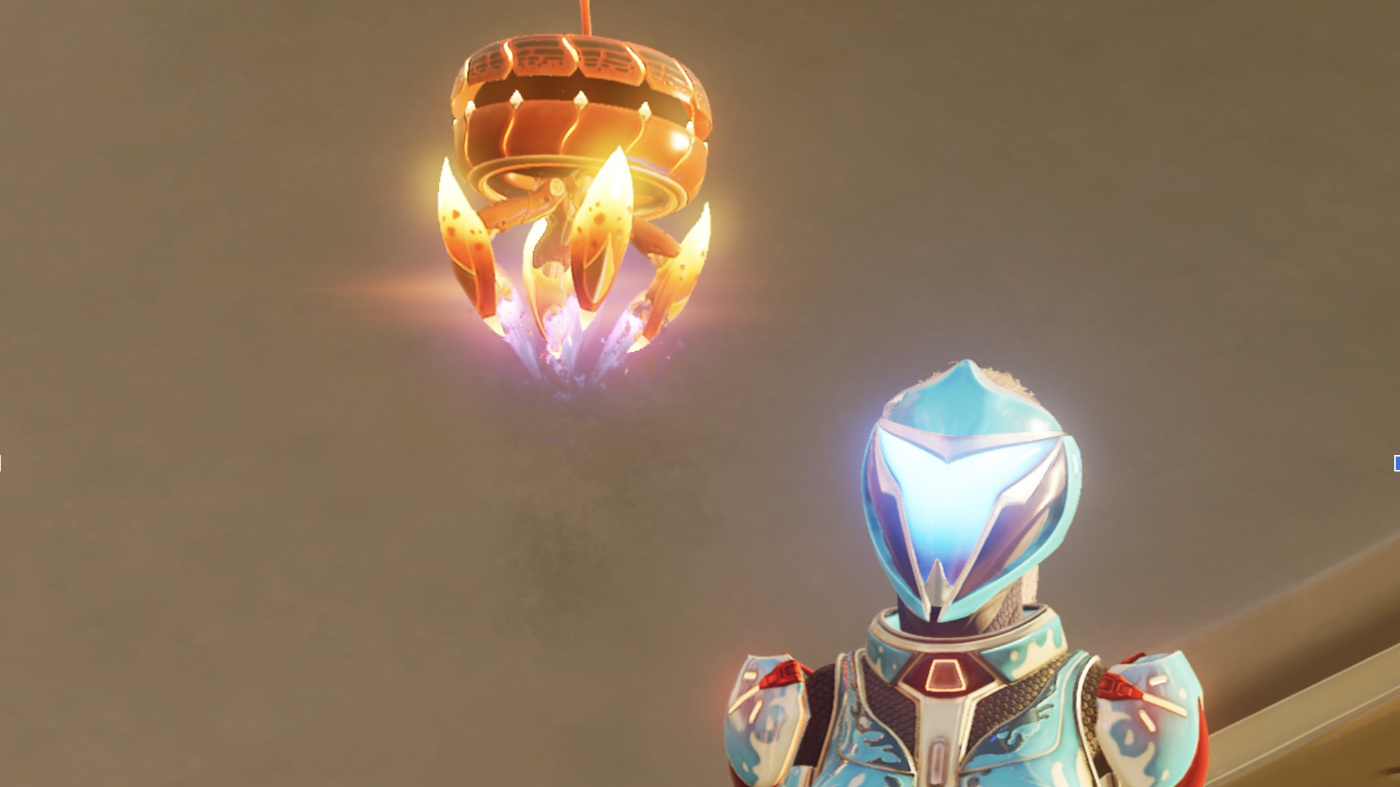
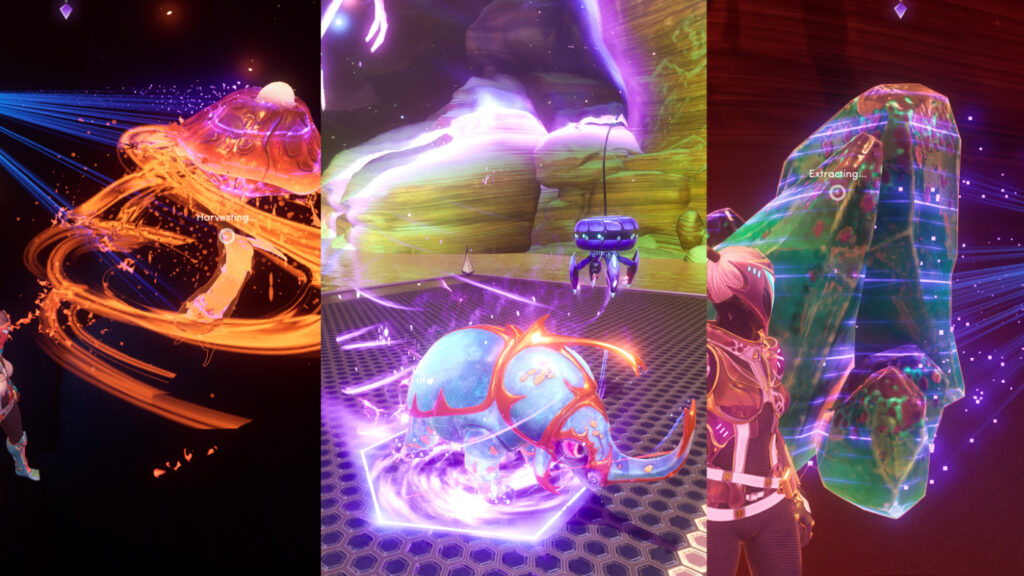
Overworld has many gameplay mechanics that keep players roaming the lost world of Illuvium. Upgrading Mozart, your drone companion, has to rate among the most important. Mozart scans the environment, mines resources, and helps you capture Illuvials.
If this is your first time hearing about Overworld, I would suggest checking out our “first look” to get an understanding of the game.
After you do a few runs in the Overworld collecting different ores you should have enough resources to start building some drone chip upgrades for Mozart. You can forge these at the starting location in Sanctum Mesa in the drone tab.
Upgrading chips improves many abilities, including but not limited to:
- Improved Illuvial capture ability
- Enhanced mining and harvesting
- Increased inventory capacity for equipment, weapons, and illuvials
- Scanning capabilities
There are 16 base chip upgrades, and each upgrade comes with a bonus secondary attribute (of the original 16). This means there are 256 different chip possibilities! Mozart has just three chip slots, and some of the chips are costly in resources, meaning hours of grind to gather the necessary materials.
Like most assets in Illuvium, each upgrade has three stages (evolutions/levels) which provide improved performance. They also vary by Tier (up to Tier 5, denoted by the white notches at the top of the drone upgrades), which cost increasingly more in both quantity and rarity. In general the Tier system should mean better chips as you increase Tier, however I found this isn’t exactly the case in the current build (see tip 4 below).
Drone upgrades are one of the most complicated and complex aspects of Illuvium Overworld, but they are also incredibly valuable: maximising resource, earning in-game yield, NFTs, and saving a lot of time grinding.
This article will explain some of my findings after completing over 100 runs in the Overworld.
Here are my five tips:
- Understand chip slots
- Set objectives
- Re-roll your chips
- Higher tier does not mean better
- Best middle slot chips
1. Understand chip slots
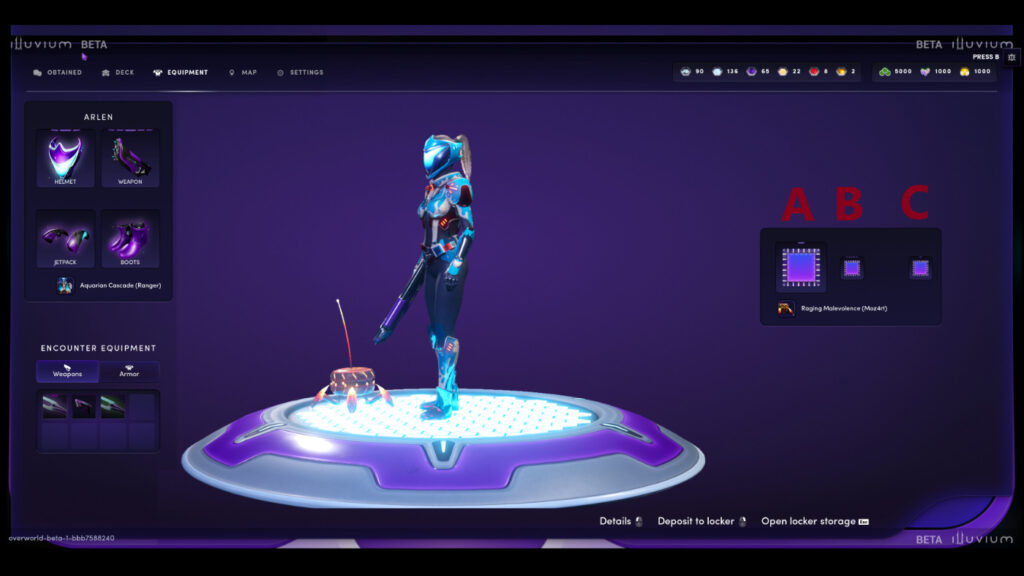
Chip load out interface
There are three chip ports on Mozart and I have made the mistake of building a load out I thought would work perfectly only to find out I can’t run all three chips the way I wanted. This is a huge waste of time, resources, and eventually money (when the game is live). So as a rule of thumb:
- Mining, harvesting and capturing related upgrades can work in the left slot
- Scanning, detection and heat mapping work in the center
- Everything can work in the right
Knowing this beforehand will allow you to properly plan your perfect build to conquer the Overworld. For a comprehensive list, check out this graphic made by Illuvium community members @TimmeyILV and @dzierski.
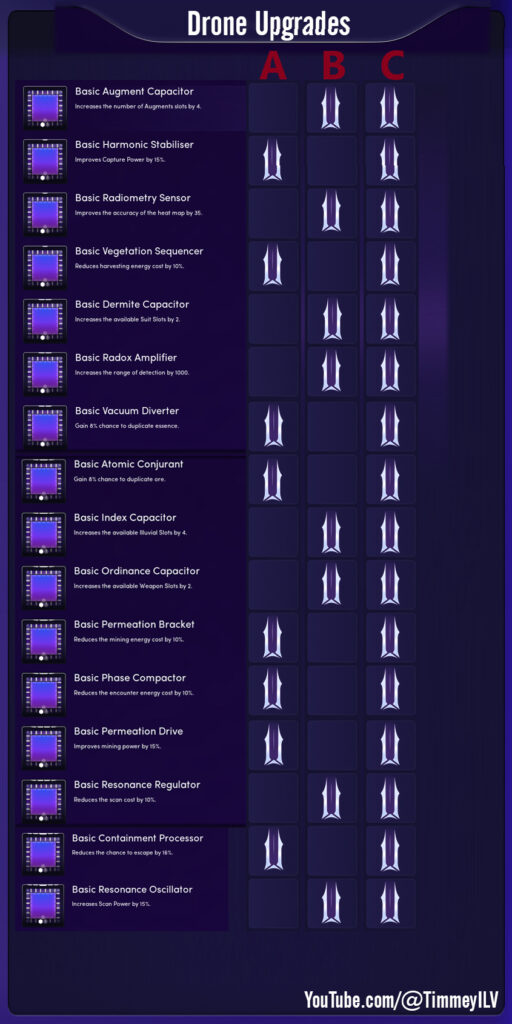
Which chips work in which slots
2. Set objectives
Focus of purpose is important
Before you head out to the Overworld decide what you are hunting for. Are you going to mine, harvest, or capture Illuvials? This allows you to maximize your return on fuel (expended by any activity) by equipping chips that best work towards that mission.
If you are hunting Illuvials you shouldn’t waste a drone slot with mining or harvesting upgrades. This also means that you don’t scan and jump in an encounter if you are on a mining run.
This can be hard, because the temptation to capture Illuvials can be intense while roaming the Crimson Waste, but focus is worth it. This will have a huge impact on your total haul from the run and you will start to see solid returns if you have a couple different loadouts for the different objectives.
Until you have the higher stage and tier chips you won’t run out of a resource type. If you have everything then see section 5 below for some insights on how to set up your load out.
3. Re-roll your chips for optimal bonus attributes
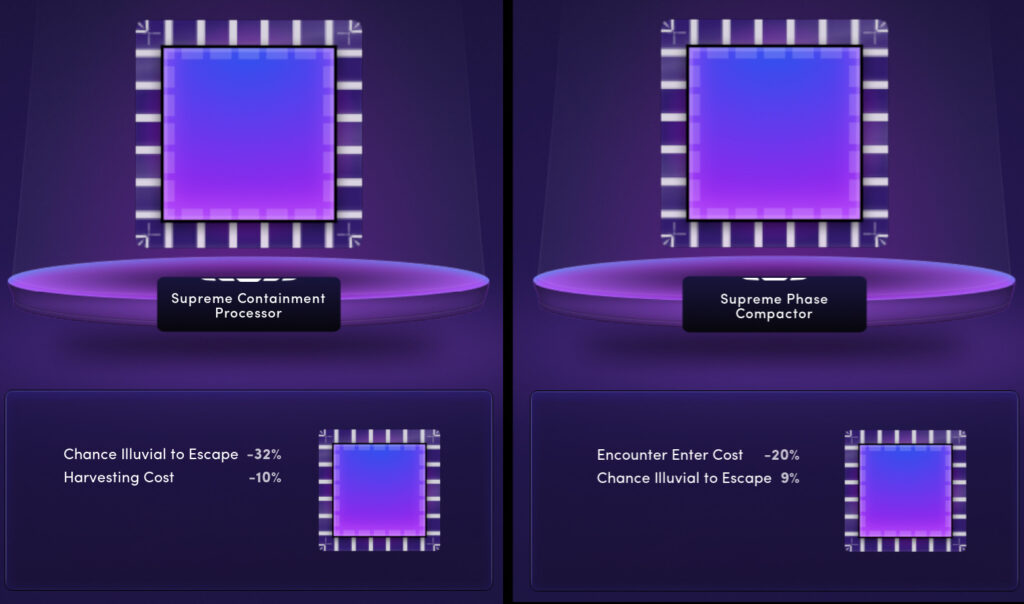
The left chip has conflicting goals: the primary is to capture illuvials but its secondary is harvesting plants. It would be inefficient to use that chip whereas the chip on the right has two bonuses that work towards the same goal.
When forging these chips you can get very useful secondary attributes. It is important to get attributes that will compliment the primary chip. See the example above.
When you are doing a run you must focus on one goal as described above. And these have different missions. So it is useful to deconstruct chips and rebuild them with the hopes of a better secondary.
4. Higher tier does not always mean better
The higher chips are a grind fest to obtain. I would know: I spent the first 50 or so runs purely mining to get them all. And in the current beta they don’t always provide an advantage.
Now, this may be a balancing issue that will be resolved in updates, but at this point the stage 5 chips are just not worth the time and resources needed to build them. The lower tier chips can actually provide a better return on fuel.
5. Best middle slot chips
I will be doing an extensive course on Overworld in the Polemos Forge (Forge | Polemos GameFi Platform) in the future, that will dive into all 3 slots. However for now I will present my findings for the best chip in the center. Since these are mostly upgrades around detection and scan, they can feel less impactful than the other two slots which can have a larger impact on the return. To investigate their impact I maxed out a couple of the chips to determine their potential.
Detection range upgrades
The advantage of detection upgrades wasn’t clear until I was able to reach the strong chips. I initially assumed the upgrades – for example, a stage 3 3000 – would increase the range of my visor. However I eventually discovered the “3000” referred to the range Mozart could detect in meters.
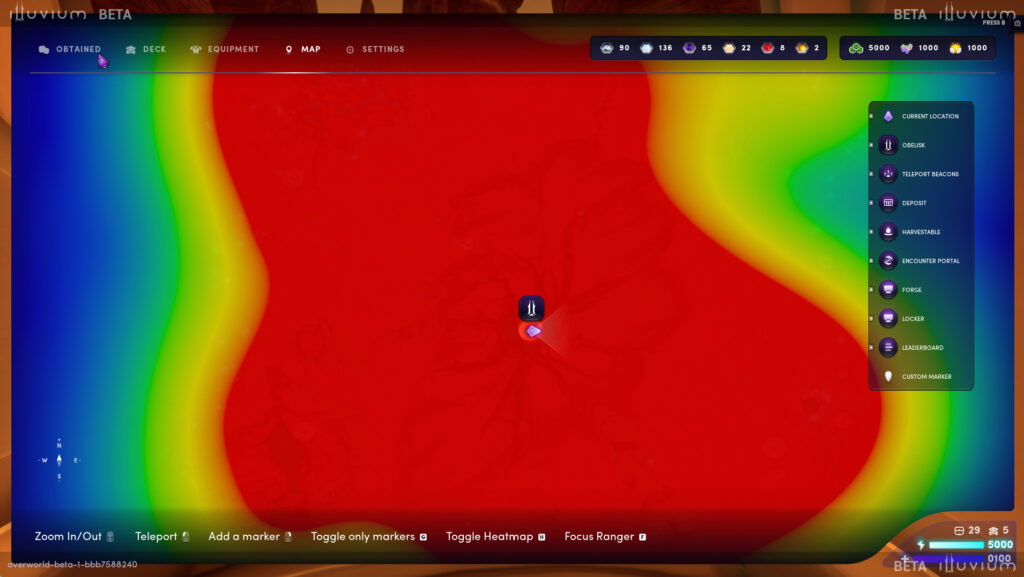
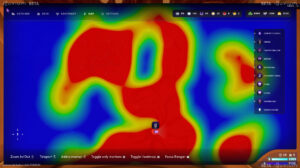
Starting at the max detection range of 10,500 using all three slots with stage 3 chips, this is what I could detect on the map:
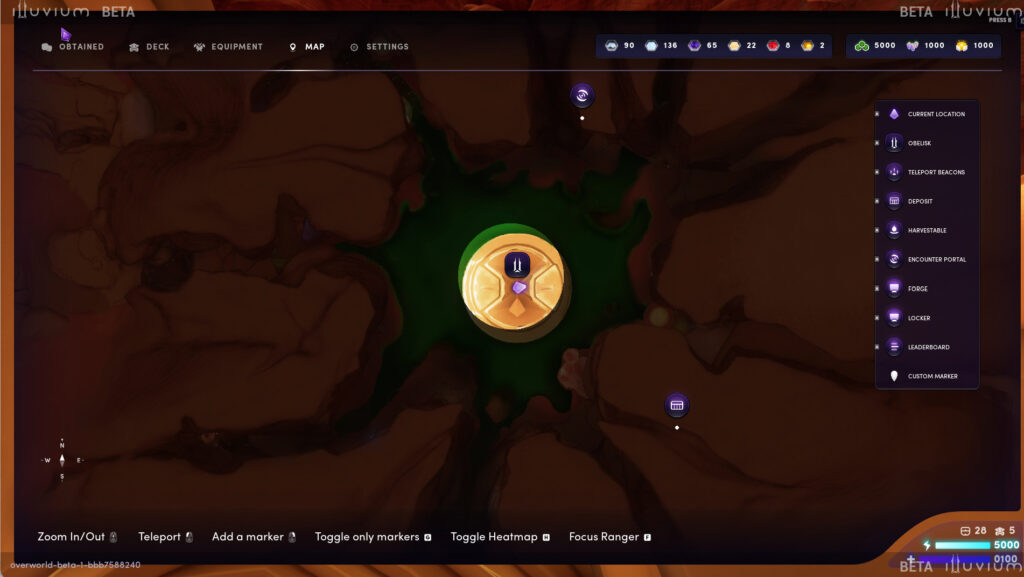
Map of detection range 10,500
In the image above you can see that Mozart is detecting one encounter to the north and one deposit node to the south east. Compare this with the visor view at the exact same positioning, you can see the minimap in the bottom left shows the same information.
Stage 3 visor at the same location
It becomes clear that max detection is obsolete. With this visor I can see two other deposits in addition to those detected by Mozart.
Unless they significantly improve your range, I consider the detection upgrades to be almost useless. If someone were to max this out I would expect it to show 30%+ of the map minimum.
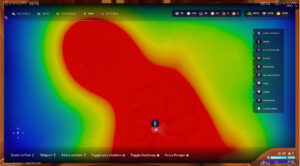
Heat map accuracy upgrades
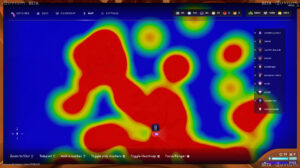
These chips seemed promising because the heat map with no upgrades is pretty useless and covers the whole map.
Heat map 0
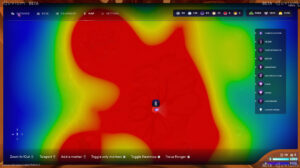
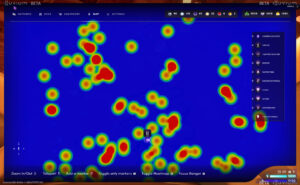
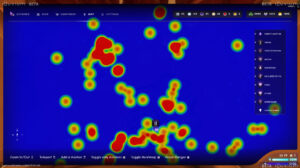
I wanted to see how resolution improves with each upgrade. You can see the results below of how each increase starts to pinpoint the node of resource or encounter, until you max out at 220 accuracy.
Heat map 30
Heat map 65
Heat map 95
Heat map 125
Heat map 160
Heat map 190
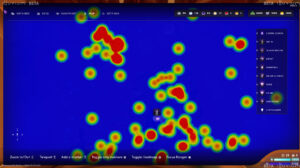
Heat map 220
From the images above, you can see there is a substantial improvement from 125 to 160. The 160 is the sweet spot for this upgrade. Going higher is a waste.
In general, I believe this upgrade will generally be a waste: the exception is if you are hunting Tier 5 Illuvials and want to make sure you have scanned every possible encounter on the map.
Influence of drop rates on chip loadout
In order to worked out the ideal chip loadout, you have to understand the relative drop rates of resources each time you play Overworld. Having played exhaustively, I now believe there are roughly 100 resource and encounter nodes per run. The breakdown varies from run to run, but here are my estimates.
Encounters: 15-30
Deposits: 35-50
Consumables: 35-50
This can be useful information in maximising your drone setup. For example, you could create a mixed kit that would target 15 encounters at a minimum and then use the excess energy to mine some deposits. Feel free to share your thoughts on how to best maximize the drone upgrades in our discord: https://discord.gg/polemos
Make sure to select the Illuvium Role to open the Illuvium community channels.
Scan power upgrades
Scan power chips are disappointing. Being a T5 Chip that requires a big amount of resources to upgrade to stage 3, I expected big things. However it felt like there was no improvement. In stage 0 runs I would still have ore deposits where only 3 of 10 would show! This is incredibly frustrating considering the amount of time put into building these up.
I feel this chip set needs to be enhanced significantly. If some crazy grinder wants to get three chips, all with scan power, then 100% scan reveal rate would be appropriate. I am currently building towards this and will update this article once I have a more clear conclusion.
Reduce scan cost upgrades
Scan cost reduction is the best option for the center drone slot. It can actually increase your loot collection for the run and increase your return on fuel (which will be invaluable once the game is live and actually costs real money).
Conclusion
As a player who loves crafting useful items, I find that Illuvium has created a system that keeps me engaged for many hours. Bear in mind, this is only the closed beta, and all the data will be wiped soon! I’m expecting my life to be consumed when the full game arrives.
There are still a lot of improvements needed, but that is expected at this stage. One of my biggest complaints is the way you equip from the locker: it is unclear and difficult to differentiate chips. Also, currently you are unable to switch chips in the Overworld, which I think would improve things.
Please let us know what you found useful in this article, so we can keep this in-depth research coming. Sharing the article will also go a long way in getting this information out to those who may be struggling to understand the drone upgrades. See you in the caverns of Crimson Waste.
Disclosure notice: Cavan Roe holds Illuvium assets. This article represents his true opinions, and is not a paid promotion.